
Shoot for the Stars: Astrophotography Tips

By Keith Arnold, WWF
If you are a visual learner, check out, Night Photography 101, a recorded webinar featuring photo pros from Nat Hab and WWF — Court Whelan and Keith Arnold respectively.
If you’re looking for ways to take your photography to the next level, I’ve got a secret for you. Astrophotography—the art of photographing celestial bodies or wide areas of the nighttime sky—isn’t as complicated as you might think. You don’t need to spend a fortune on new gear either.
By following these tips, your celestial shots will rack up likes on Facebook and Instagram in no time.
Location, location, location
The greatest necessity for solid astrophotography results can’t be purchased in a store or found on a street corner. In fact, the farther you get from a store or street corner, the more likely you are to find it. I’m talking about a dark night sky. Darkskyfinder, opens in new tab.com will help you find the darkest spots in the US, including the American Southwest, and the International Dark-Sky Association has compiled a list, opens in new tab of parks across the globe with exceptional starry skies, including those in Namibia and Chile. You can also check out this global dark site map, opens in new tab.
When to Shoot
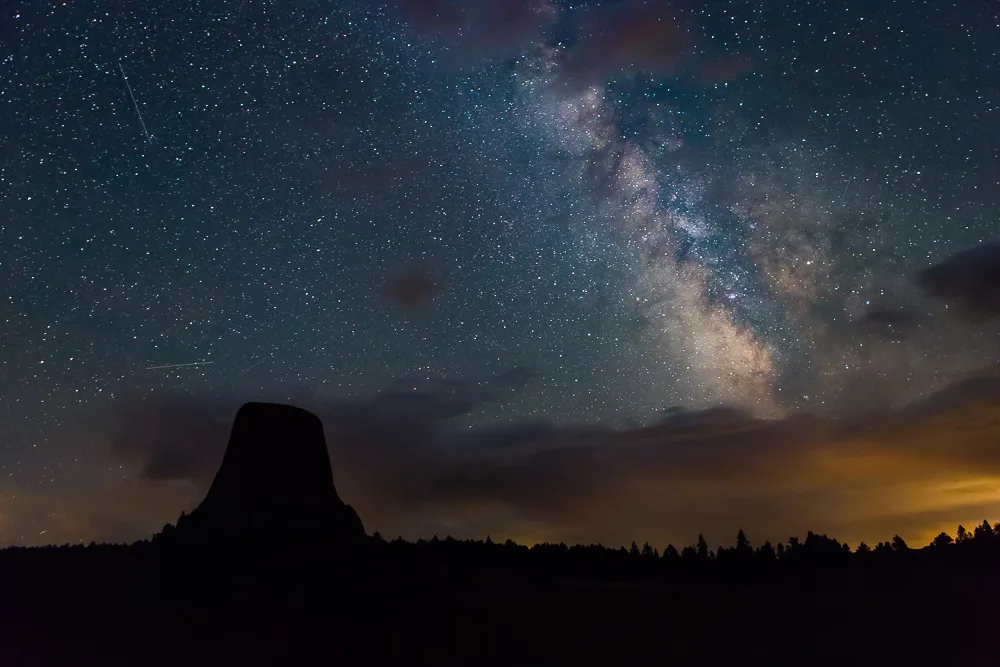
Most photographers aim for the brightest part of the Milky Way, known as the galactic center, when composing their shots. This mass of star clusters at the rotational center of our galaxy is the most photogenic part of the Milky Way because of its luminosity and contrasting gas clouds. In the Northern Hemisphere, the galactic center is most visible from May through early August.
If you’re traveling elsewhere, consult the PhotoPills app, opens in new tab, which includes a guide to pinpointing the galactic center at any time from any place on Earth. It also considers moon phases and the Milky Way’s elevation to help you plan the optimum time and location for astrophotography.
Naturally, you won’t be able to see the Milky Way if cloud cover is in the way. While no one can accurately predict what the weather will be like weeks or months from now, you can still look at trends in historical weather data for some clues. Weather Planner, opens in new tab has developed an algorithm that predicts future conditions up to a year in advance. While not failsafe, it doesn’t hurt to check out their predictions. To be safe, give yourself at least three consecutive nights of shooting.
Lastly, plan your astrophotography trip around the new moon. A full or nearly full moon will drown out the Milky Way in your photos.
Gearing Up
First off, you’ll need a camera body with decent high-ISO performance. Since you’ll be shooting mostly at ISOs above 3,200, the less noise you begin with, the better. Cameras with full-frame sensors (such as the Canon 5D series; Nikon D5, D810, or D750; Pentax K-1, or Sony Alpha A99 II) generally have better light-gathering capabilities, which translates into better image quality and less noise at high ISOs.
If a full-frame body is out of your price range, don’t sweat it. You can always reduce some of the noise later using editing software.
To photograph the Milky Way, you’ll need a fast lens with a wide focal length (35mm or wider). By fast, I mean a lens with a maximum aperture of f/2.8 or greater. Shooting wide open will allow more of that dim starlight to hit your sensor after travelling thousands of years through the void of deep space.
There are great lenses that meet these criteria and cost under $500. Check out the Rokinin 14mm f/2.8 or 24mm f/1.4 lenses, both of which are available with Canon, Nikon, Sony, and Pentax camera mounts. These lenses offer superb optical performance considering their cost and exhibit low comatic aberration (meaning the stars on the edges of your photo won’t look like doughnuts). A potential downside for some is that they’re manual focus lenses.
As with all low-light photography, a sturdy tripod is essential for photographing the nighttime sky. Invest in a lightweight carbon fiber tripod, as you may find yourself trekking to get away from roads or streetlights.
And finally, nothing is worse than fumbling for your lens cap in the middle of a pitch-black field while terrifying animal noises come at you from multiple directions. (Yes, this happened to me.) An inexpensive headlamp with a red filter to preserve your night vision will help.
Technique
Now that you’ve assembled your gear and traveled to a dark place on a clear, moonless night, it’s time to nail those perfect shots of the Milky Way. To do so, follow these steps:
Point your camera toward the brightest part of the Milky Way. In the Northern Hemisphere, the galactic center will appear in the southern sky. If you’ve truly found a dark spot, you should be able to see it with the naked eye after giving yourself 15-20 minutes to adjust to the darkness.
Set your camera to manual mode and open your lens to its widest aperture (aiming for f/2.8 or wider).
To figure out the ideal shutter speed, we’re going to follow the “500 Rule.” Because our planet is spinning through space, all celestial bodies are constantly on the move in relation to an observer on the ground. Yet you want the stars to be as sharp as possible. So you must select a shutter speed that won’t introduce motion blur. According to the 500 Rule, the longest shutter speed that can be used before you start to see star trails is equal to 500 divided by your focal length. For example, if you’re using a 24mm lens, 500/24 = 20.8 seconds. If you keep your shutter open for 21 seconds or longer, you’ll begin to see motion blur in the stars. The wider your lens, the longer you can expose the shot while maintaining maximum sharpness.
Set your lens to manual focus and go to live preview mode (if your camera has it). Point your camera to the brightest star or planet in the sky and use the magnification button to zoom in as close as you can. Manually adjust the focus so the star or planet is sharp. If you’re using a prime lens (one with a single focal length), you won’t need to worry about focus again. If using a zoom lens (with multiple focal lengths), you’ll need to repeat this process every time you zoom in or out. If your camera doesn’t have live view, set your lens to infinity and take some test shots. Magnify the image on your display to see if the stars at the center of the frame are in focus. If they’re not, try making micro adjustments until you achieve maximum sharpness.
I recommend shooting in RAW format. JPEG compresses files and some information is lost. With memory cards being so cheap, there’s no reason you shouldn’t be shooting RAW. Corrections to white balance, exposure, and other variables are much easier when working with a RAW file.
Set your camera to timer mode or use a remote trigger. The simple act of pressing the shutter-release button will introduce a small amount of camera shake, so you’re better off using the timer for maximum sharpness.
Set your camera’s ISO to 3,200 as a starting point. Take a few shots and view the results on your camera’s display. Can you make out the Milky Way? Shoot some images at lower and higher ISOs and notice how the brightness of the galactic center changes. Keep in mind that the higher the ISO, the more noise you’ll introduce to the image. Aim for the lowest ISO that will give you satisfactory results.
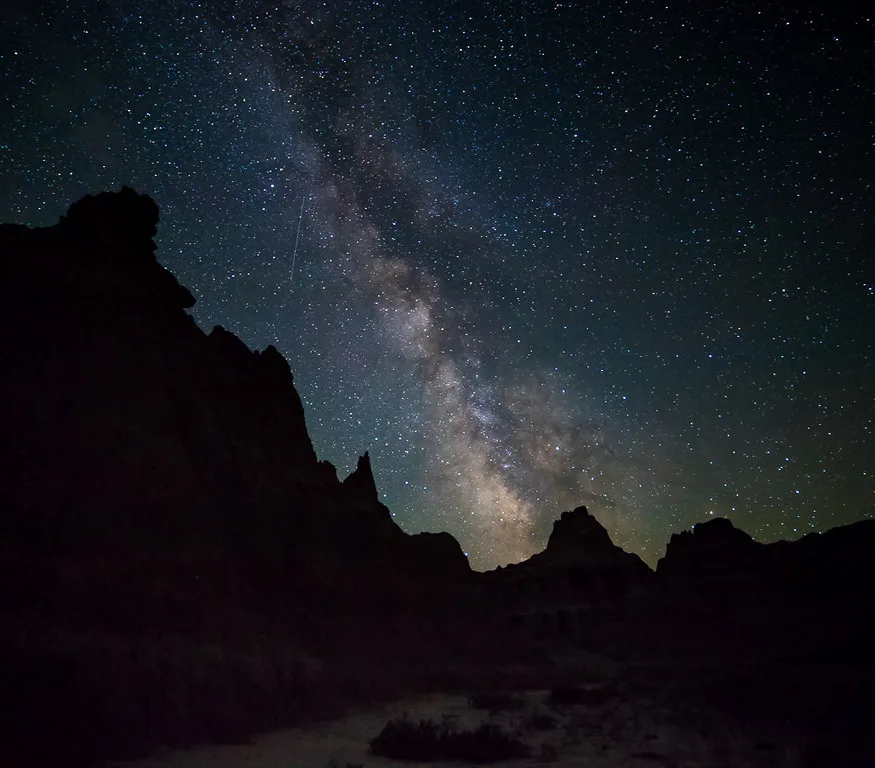
Once you get the hang of properly exposing the Milky Way, get creative. Try incorporating nearby objects, such as trees, rocks, or abandoned buildings, into your shots. Capture the Milky Way’s reflection on the surface of a still body of water. Use your headlight or a powerful flashlight to “paint” light onto trees, rocks, or even people. Place a flashlight inside a tent and incorporate that into the image.
Post-processing
Even the most advanced photographers will need to do some post-processing work to really make their images pop. You’ll find plenty of video tutorials on editing shots of the Milky Way on YouTube.
Once you’ve edited your photos, share them with family and friends. And get some rest! You must be exhausted from staying up all night.
Keith Arnold is a photographer and manager at World Wildlife Fund.